
Guides tumbling
How a Rock Tumbler Works: A Beginner's Step-by-Step Guide
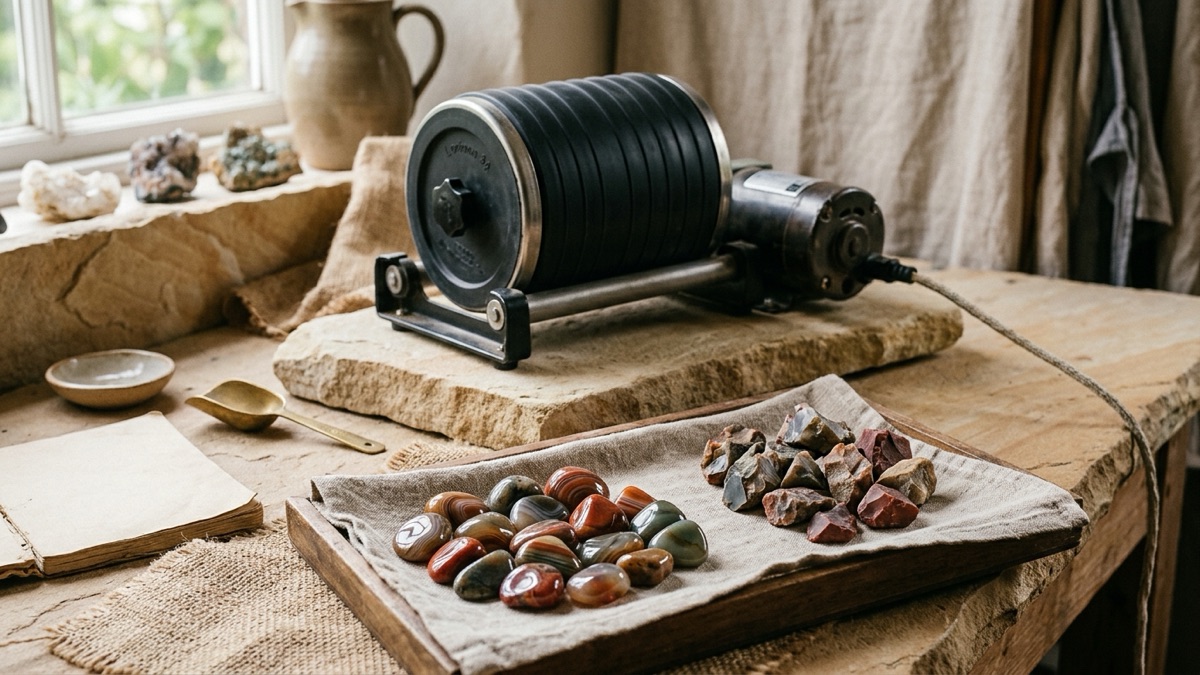
You brought home a pocketful of pretty beach stones, and once they dried on the kitchen counter they looked plain gray. Wet, they glowed. A rock tumbler is how you make that wet-look shine permanent. It is simpler than it looks, and a lot slower than most people expect.
Quick answer
A rock tumbler turns a sealed barrel of rocks, water and abrasive grit for days, so the grit grinds the rocks smooth. You run four stages, coarse, medium, fine and polish, about a week each in a rotary tumbler, washing everything between stages. Fill the barrel about two thirds, and never pour the slurry down a drain.
Key takeaways
- A tumbler copies what a river or a beach does to pebbles, only much faster: hard grit trapped between rolling rocks grinds them down, and each finer grit erases the scratches of the one before.
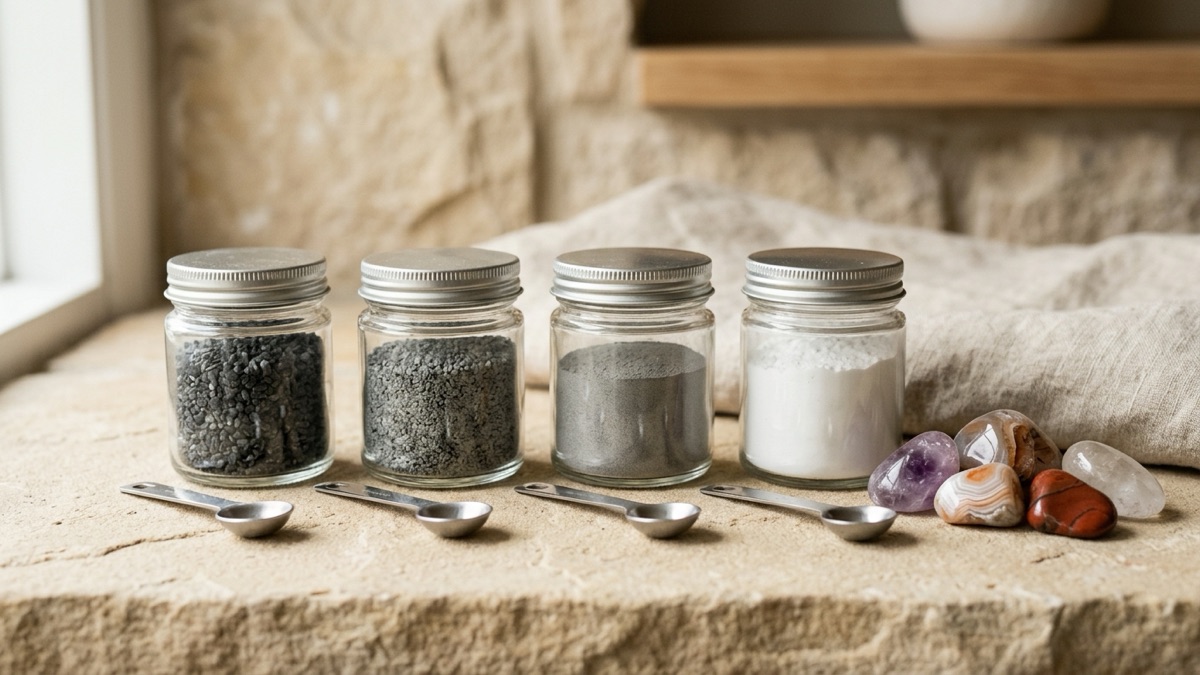
- There are four stages: coarse (60/90 silicon carbide), medium (about 120/220), fine (500 or 600) and polish (usually aluminum oxide). In a rotary tumbler, plan on four to eight weeks.
- Load the barrel about two thirds full with a mix of rock sizes, add about two level tablespoons of grit per pound of rock, and add water to just below the top layer of rocks.
- Clean the rocks, barrel and lid completely between stages. A few leftover grains of coarse grit can scratch a whole batch.
- Rinse over a bucket, never the sink. Tumbler slurry settles in pipes and hardens.
What is a rock tumbler?
A rock tumbler is a small machine that keeps rough rocks moving against each other in water and abrasive grit until they are rounded, smooth and shiny. The most common kind is the rotary tumbler: a small motor drives a roller, and a sealed barrel resting on the rollers slowly rolls, hour after hour, for days at a time.
The other kind, the vibratory tumbler, rapidly shakes its bowl instead of rolling it. It is faster and keeps the rocks closer to their original shape. We compare the two in rotary vs vibratory rock tumblers. This guide follows the rotary method, because it is what most beginners start with.
How does a rock tumbler work?
Picture the inside of the barrel. As it turns (RockTumbler.com puts a typical rotary barrel at about 30 to 50 turns a minute), the rocks ride up one side and then slide and tumble back down. Wherever two rocks touch, a few grains of grit get pinched between them and scratch both surfaces. Over a week of nonstop tumbling, that happens an enormous number of times, and the sharp edges and bumps wear away.
Two details matter a lot:
- Contact points do the work. A barrel of only big rocks has few places where they touch, so little grinding happens. Mixing in smaller pieces fills the gaps and multiplies the contact points.
- The barrel needs room to tumble. RockTumbler.com filmed a barrel through a glass lid: at about two thirds full, the rocks roll nicely; much fuller and the whole load just turns as one lump; under half full and the rocks get thrown around and chip.
Each stage uses a finer abrasive than the last. Coarse grit does the shaping, medium and fine grit remove the scratches left by the stage before, and the polish, a powder only a few microns across, brings up the shine. Our rock tumbler grit guide explains the grit numbers and why sand will not do the job.
What do the four stages do?
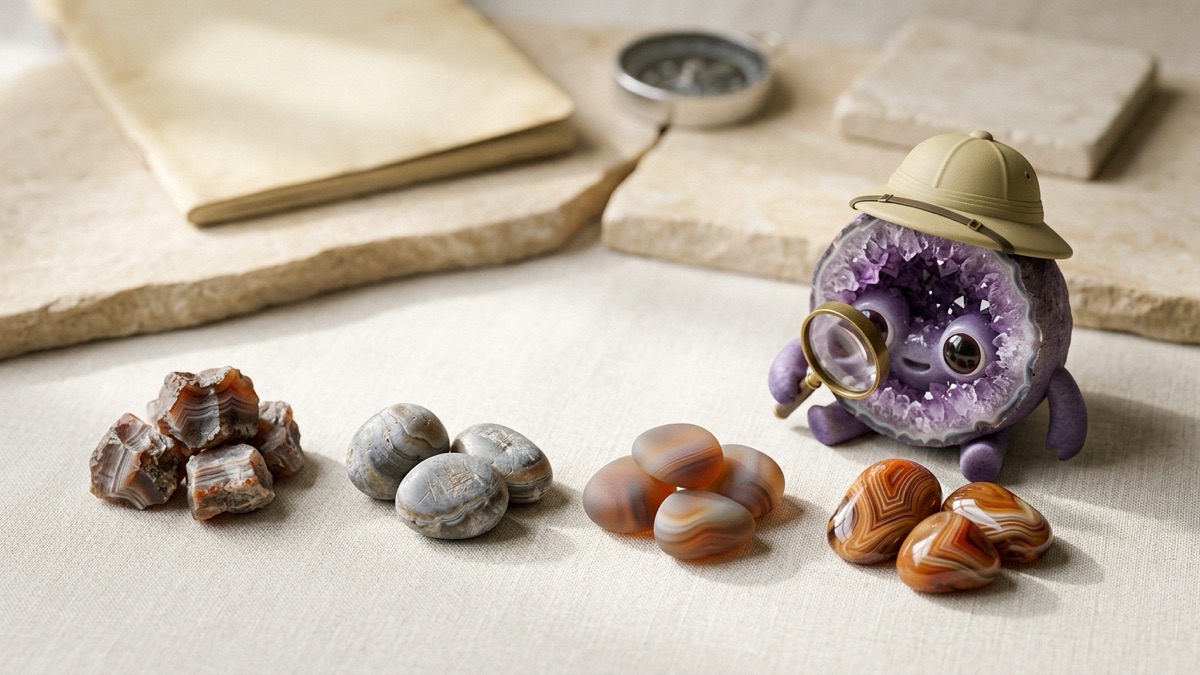
Here is the standard four-stage recipe for a rotary tumbler, with what your rocks should look like, dry, at the end of each stage. Maker instructions differ a little on grit sizes, so treat these as typical, not fixed.
| Stage | Typical abrasive | Usual time (rotary) | Dry rocks afterward |
|---|---|---|---|
| 1. Coarse | 60/90 silicon carbide | 7 days, often repeated | Edges rounded, surface still rough and scratched |
| 2. Medium | 120/220 or 150/220 silicon carbide | 7 days | Smooth, frosted, matte all over |
| 3. Fine (pre-polish) | 500 or 600 silicon carbide | 7 days | Very smooth, a few show a faint sheen |
| 4. Polish | Aluminum oxide (cerium oxide for some materials) | 7 days | Bright and shiny, the same dry as wet |
Two of the makers we checked do it slightly differently. Lortone's Model 3A manual uses 60/90 and 120/220 silicon carbide, then an aluminum oxide pre-polish and polish. Kingsley North's instructions use 80 grit, 220 grit, 600 grit and then cerium oxide, and they call the coarse stage the most important step, one that takes 7 to 10 days. For a full stage-by-stage look at one batch, see rock tumbler before and after.
How do you use a rock tumbler, step by step?
1. Pick the right rocks
Tumble one kind of rock at a time, or at least rocks of similar hardness. Jasper, agate and petrified wood are the classic beginner rough because they are hard, dense and take a bright polish. If you are not sure a piece is real wood, our guide on how to identify petrified wood shows the clues. Skip anything cracked, porous, crumbly or much softer than the rest, because a rock that breaks or sheds grains will scratch every other rock in the barrel. Our list of the best rocks for tumbling goes through the good ones and the ones to skip.
For a small barrel, aim for pieces from about 1/4 inch to 1 1/2 inches across, in a mix of sizes.
Try it
Not sure how hard your beach finds are? Scratch-test them against glass and steel, then look them up in the free Mohs hardness scale tool. Rocks that scratch glass (about 5.5) are usually the ones worth tumbling.
2. Load the barrel
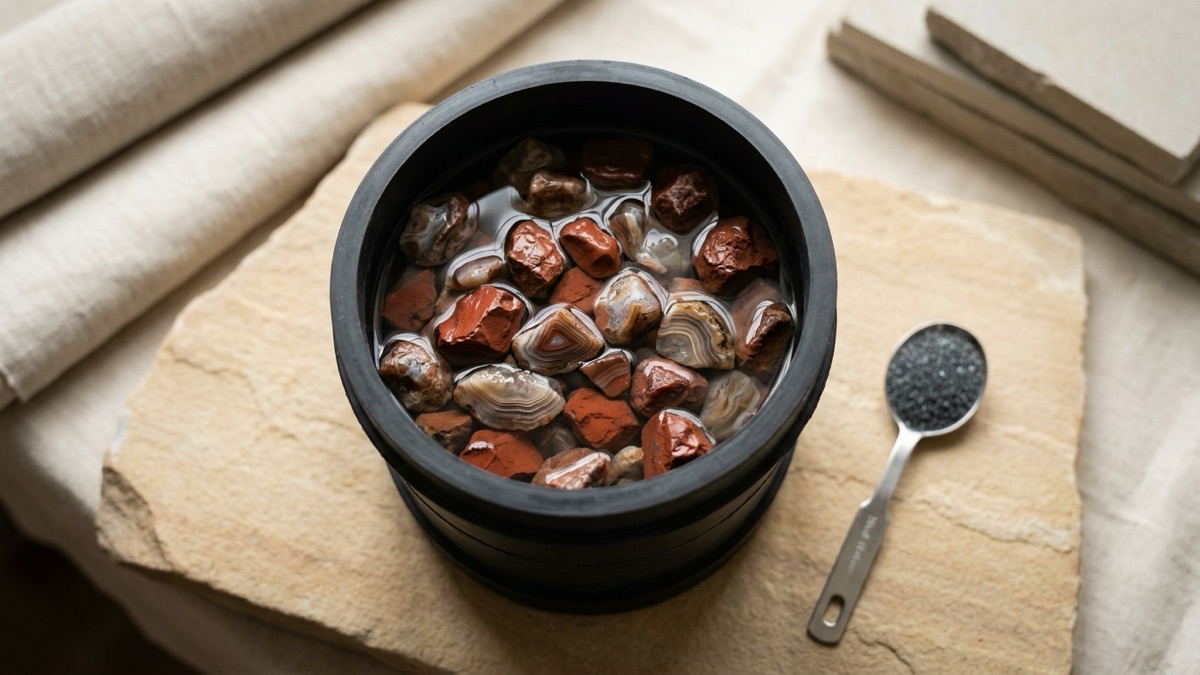
Start with a perfectly clean barrel. Fill it about two thirds full of rock. RockTumbler.com and Lortone say one half to two thirds; Kingsley North says two thirds to three quarters. The barrel's rating includes everything: RockTumbler.com explains that a "3-pound" barrel takes about two pounds of rock plus a pound of grit and water.
3. Add grit and water
Add about two level tablespoons of coarse grit for each pound of rock. (Lortone's 3A manual simply says 4 level tablespoons of 60/90 for its barrel.) Then add water until it sits just below the top layer of rocks; Kingsley North warns that too much water gets in the way of the tumbling. Use a separate spoon for each grit size so coarse grains never sneak into a later stage.
4. Close it up and run it
Wipe the rim of the barrel and the lid completely clean, because grit on the seal can cause leaks. Lortone's manual says to tighten the lid nut by hand only, since overtightening can warp the lid. Set the barrel on the rollers and switch on.
5. Check early, then wait
Open the barrel after a day or so. Kingsley North suggests 24 hours to release any gas that builds up during the coarse grind, and Lortone's troubleshooting page says to vent the barrel now and then. If the slurry looks like thick paste, add a little water. Then let it run for the full week.
6. Rinse, inspect and repeat
At the end of the stage, pour everything into a colander over a bucket and rinse the rocks right away. Once the gray mud dries on the rocks, it is very hard to get off. Pull out any cracked pieces. If the rocks still have sharp points, give them another week of coarse. RockTumbler.com says they almost always do two weeks of coarse themselves.
Then wash the rocks, barrel and lid with mild soap and water, as Lortone's manual advises, and run the next stage with the next grit. Because the coarse stage grinds away a good share of the rock (RockTumbler.com estimates 10 to 30 percent of the volume), top the barrel back up to two thirds with smaller rocks or ceramic media, small fired ceramic pellets that fill gaps and cushion the load.
7. Polish, then check the shine
After the polish week, rinse, dry a few stones and look at them. If they look as good dry as they did wet, you are done. If they have a faint haze, a short run in soapy water, called burnishing, often brings up the shine. If they are scratched, go back to the medium stage.
Heads up
Never rinse grit or rock mud down a sink, tub or toilet. Lortone's manual warns it will clog the drain, and Kingsley North says it settles in pipes and hardens like cement. Let the bucket stand until the mud settles, pour the clear water off outdoors, and let the sludge dry before you bag it for the trash. Wear safety glasses when you dump a barrel, because the mud splashes.
How long does rock tumbling take?
A rotary batch takes about four weeks at the fastest, one per stage, and often six to eight, because shaping in coarse grit is slow on hard rocks. A vibratory tumbler usually finishes in one to two weeks, with about a quarter as much grit, but it does not round the rocks. Many hobbyists combine the two: rotary for the coarse shaping, vibratory for the rest.
Softer materials go faster and need gentler handling. RockTumbler.com says calcite and marble (Mohs 3) may round in coarse grit in two or three days, and fluorite and obsidian in four or five. Leave them in for a full week and they shrink to crumbs.
How loud is a rock tumbler, and where should it run?
It depends mostly on the barrel. In RockTumbler.com's own sound-meter tests, taken three feet away, small rotary tumblers with soft rubber barrels measured roughly 55 to 64 decibels, about the level of normal conversation, while the loudest machines they tested reached the low to mid 70s. Their advice: hard plastic barrels rattle, soft rubber barrels muffle the rocks.
Most people run tumblers in a garage, basement or workshop, on a level surface away from anything that could get splashed. Do not put a box over the tumbler to quiet it: the motor is air cooled and can overheat. Lortone's manual notes that it is normal for its motor to run hot to the touch, which is one more reason to keep the vents clear.
A little maintenance keeps it quiet. Lortone's manual calls for one drop of light oil on each shaft bearing every 30 days of running time, and RockTumbler.com warns never to oil the rubber barrel, belt or rollers. Follow your own manual.
Fun fact
Rivers and beaches tumble rocks with sand, which is mostly quartz. Tumbler grit is silicon carbide, which sits at about 9 to 9.5 on the Mohs scale, well above the quartz family's 7. That hardness gap is why a tumbler does in weeks what a river does over a much longer time.
Which kind of rock tumbler should you get?
We do not rank brands, but the features that matter are easy to check on any model's own pages and manual:
- Rotary or vibratory. Rotary rounds the rocks and is the usual first machine. Vibratory is faster, uses about a quarter of the grit and keeps shapes; when we checked in September 2026, RockTumbler.com, a tumbler retailer, said it typically costs about half again as much.
- Barrel material. Soft rubber barrels are much quieter than hard plastic ones.
- Barrel size. Hobby rotary barrels range from about a pound of rock to several pounds. Bigger barrels need more rock, grit and power per batch.
- Built to run nonstop. Look for a motor the maker says is designed for continuous use.
- Parts you can buy. Spare barrels, lids, belts and bearings keep a tumbler going. A second barrel used only for polish helps prevent contamination.
When you are ready to shop, our guide to the best rock tumbler for beginners walks through these choices in more depth.
What are the most common beginner mistakes?
- Overfilling or underfilling the barrel. Too full and nothing tumbles; too empty and the rocks crash and chip. Aim for about two thirds.
- Mixing soft and hard rocks. The soft ones vanish before the hard ones are shaped.
- Tumbling bad rough. Cracks, holes and grainy textures do not polish, and the pieces they shed scratch everything else.
- Moving on too soon. Coarse is where the shape comes from. If the points are still there, run another week.
- Sloppy cleaning. Grit hiding on the lid, the rim, your hands or a shared spoon ends up in the polish.
- Letting the mud dry on the rocks, or pouring it down the drain. Rinse right away, over a bucket.
- Forgetting about gas. Some materials give off gas as they grind. Vent the barrel now and then, especially early in a batch.
The takeaway
A rock tumbler is patience in a barrel. Load it about two thirds full with good, hard rough, add the right grit and water, and let each stage run its week. Clean like you mean it between stages, keep the slurry out of the plumbing, and your gray beach pebbles will come out looking the way they did wet. If you are not sure what a stone is before it goes in, the free rock identifier can suggest likely candidates. The RockhoundID app, coming soon, will suggest likely matches from a photo and tell you which test confirms them.
The pictures in this guide are AI-generated illustrations of what to look for; real specimens vary, so trust the tests over any picture. RockhoundID guides help you narrow down what you found. They suggest likely candidates, not certain identifications or appraisals. For anything valuable, rare or possibly from space, ask a museum, a university geology department or your state geological survey, and check the collecting rules for the land before you take anything home.
Questions rockhounds ask
How long does a rock tumbler take to polish rocks?
In a rotary tumbler, plan on four to eight weeks: about a week each for coarse, medium, fine and polish, plus extra coarse weeks for rough, angular rocks. A vibratory tumbler usually finishes a batch in one to two weeks, but it does not round the rocks.
How full should a rock tumbler barrel be?
About two thirds full of rock in a mix of sizes. Maker instructions range from half full to three quarters full. Too full and the rocks cannot tumble; too empty and they crash into each other and chip.
Can you pour rock tumbler water down the drain?
No. Tumbler makers warn that the grit and rock mud settle in pipes and can harden like cement. Rinse over a bucket, let the mud settle, and put the dried sludge in the trash.
Can you leave a rock tumbler running all day and night?
Hobby rotary tumblers are built for it: Lortone's 3A manual says its tumblers can run 24 hours a day for years with proper care. Check your own manual, keep the vents clear and open the barrel now and then to check on it.
Do you have to use all four grits?
For your first batches, yes. The four-stage recipe of coarse, medium, fine and polish is what nearly every maker's instructions use. Some experienced tumblers skip the fine stage by running medium much longer, but that is an experiment, not a shortcut.
Where these facts come from
- Lortone: Model 3A rotary tumbler instructions and parts list (PDF): lortone.com/cdn/shop/t/4/assets/3A_Tumbler_Instructions.pdf
- Kingsley North: rotary rock tumbling instructions: kingsleynorth.com/pages/rotary-rock-tumbling-instructions
- Kingsley North: how to keep your rock tumbling equipment clean: kingsleynorth.com/blogs/posts/how-to-keep-your-rock-tumbling-equipment-clean
- RockTumbler.com: rock tumbler instructions: rocktumbler.com/tips/rock-tumbler-instructions/
- RockTumbler.com: what happens in a rock tumbler: rocktumbler.com/tips/what-happens-in-a-rock-tumbler/
- RockTumbler.com: how long does rock tumbling take?: rocktumbler.com/tips/how-long-does-rock-tumbling-take/
- RockTumbler.com: how much noise does a tumbler make?: rocktumbler.com/tips/how-much-noise-does-a-tumbler-make/
- RockTumbler.com: ceramic tumbling media: rocktumbler.com/tips/using-the-right-tumbling-media/
- RockTumbler.com: save time and money with a vibratory tumbler: rocktumbler.com/blog/save-time-and-money-with-a-vibratory-tumbler/
Read next
identification
Rock Identification Apps: What a Photo Can Really Tell